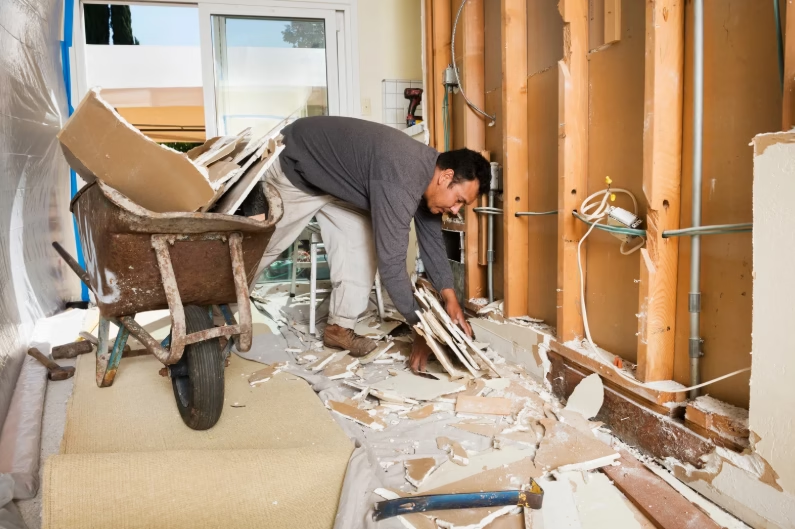
Drywall Removal: What You Need to Know Before Starting
If you’re planning a renovation project or simply need to make space for something new, drywall removal can be an essential first step. Whether you’re creating a more open floor plan, fixing water damage, or repurposing a room for a different purpose, removing drywall requires more than just knocking it down and discarding the pieces. It’s a delicate task that demands careful planning and execution to avoid injury, structural damage, and unnecessary headaches. In this comprehensive guide, we’ll walk you through everything you need to know before starting your drywall removal project.
Assessing the Need for Drywall Removal
The first step in any drywall removal project is understanding why it’s necessary. There are various reasons people might decide to remove drywall from their homes or businesses. Some of the most common reasons include:

- Renovations and Remodeling: Whether you’re gutting an entire room for a makeover or simply need to reframe the walls, drywall removal is often a key part of the process.
- Water Damage: One of the primary reasons for removing drywall is water damage. When drywall gets wet, it weakens and becomes a breeding ground for mold and mildew, both of which can be harmful to your health.
- Pest Infestation: Sometimes drywall removal is needed to access areas where pests, such as termites or rodents, have caused significant damage to the structure.
- Electrical and Plumbing Work: If you’re upgrading your electrical systems or rerouting plumbing, removing drywall might be necessary to gain access to these hidden systems.
- Changing the Room’s Functionality: Whether you’re turning a small bedroom into a larger living area or breaking down a wall to create an open-concept layout, drywall removal is often part of the process.
Before deciding whether to remove drywall, ensure that it’s the best solution for your specific needs. Sometimes, repairing a small section might be a more cost-effective and practical approach than full removal.
The Challenges of Drywall Removal
While it may seem straightforward—rip out the drywall and move on—removal comes with several challenges. These obstacles can range from minor inconveniences to significant issues that could derail your project. A few of these challenges include:
Dust and Debris
Drywall removal generates a lot of dust and debris, which can make the environment hazardous, especially for those with respiratory issues. Taking steps to minimize this, such as covering furniture and wearing protective gear, is essential.
Structural Integrity
Removing drywall incorrectly could potentially damage the studs and other supporting structures of the wall. If the wall you are removing drywall from is load-bearing, special care should be taken to avoid compromising the building’s structural integrity.
Hidden Obstacles
You might encounter pipes, wires, or ducts hidden behind the drywall. Removing drywall without knowing where these are could cause significant damage or pose a safety risk.
Waste Disposal
Drywall is heavy and cumbersome, making it difficult to dispose of properly. Improper disposal can result in fines, and you may need to rent a dumpster or schedule a pick-up service to handle it.
Understanding these potential challenges helps ensure you’re prepared before tackling drywall removal, minimizing the likelihood of delays or mistakes.
Safety Considerations
As with any home renovation project, safety should always be a top priority when removing drywall. Here are some key safety considerations:
- Personal Protective Equipment (PPE): Wear the right gear, including a dust mask or respirator, safety goggles, and gloves. The dust from drywall can be harmful if inhaled, and the sharp edges of broken drywall can cause cuts and injuries.
- Work in Pairs: Drywall is heavy and cumbersome. Having an extra pair of hands can make the job easier, faster, and safer. Having someone to help can also ensure you’re able to dispose of the drywall safely once it’s removed.
- Protect Your Space: Cover the floors and furniture with plastic sheeting or drop cloths to protect them from dust and debris. This also makes cleanup much easier.
- Proper Ventilation: Drywall dust can quickly fill a room. Open windows, use fans, or even invest in a shop vacuum to maintain air quality and reduce dust accumulation.
By following these safety measures, you’ll reduce the risk of injury and make your drywall removal project much more manageable.
Tools and Equipment You’ll Need
To remove drywall efficiently, you’ll need some essential tools. Here’s a list of what you should gather before starting:
- Utility Knife: A sharp utility knife is essential for scoring drywall and cutting through the material easily. You’ll use this to make initial cuts along seams and edges.
- Screwdriver: A screwdriver (manual or power) is needed to remove screws from drywall sheets that are attached to studs. If the drywall is nailed, a pry bar will be more useful.
- Pry Bar: This tool is useful for prying the drywall away from the studs. It can also help with removing any nails that are holding the drywall in place.
- Hammer: You’ll use this tool to break through the drywall and to help with pulling out nails and staples that are used to secure it.
- Drywall Saw: A drywall saw is helpful when you need to make more detailed cuts around electrical boxes, pipes, or other obstacles.
- Shop Vacuum: A shop vacuum can help collect the dust and small debris from the removal process, making cleanup much quicker.
Once you’ve gathered these tools, you’ll be ready to begin your drywall removal project with confidence.
Step-by-Step Guide to Drywall Removal
Now that you’re familiar with the reasons behind drywall removal, the challenges, and the safety precautions, it’s time to dive into the actual process. Here’s a step-by-step guide to help you remove drywall like a pro.
Prepare the Room
Before you start ripping out drywall, take the time to properly prepare the room. Clear out any furniture, cover floors, and ensure there is adequate ventilation. Turn off the power to the room, especially if you’ll be working near electrical outlets or switches.
Score the Drywall
Use a utility knife to score the drywall along seams, edges, and around electrical boxes or fixtures. Scoring helps create clean lines for easy removal and prevents unnecessary damage to other parts of the wall.
Remove Fasteners
If your drywall is secured with screws, use a screwdriver to remove them. If it’s nailed into place, use a pry bar to pull out the nails. Take care not to damage the studs behind the drywall.
Begin Removing Sections of Drywall
Starting from the top of the wall, carefully pull the drywall off the studs. If it’s not coming off easily, you may need to use a hammer or pry bar to loosen it further. Work your way down the wall in sections until the entire piece is removed.
Take Care of Electrical and Plumbing
As you remove drywall, take note of any electrical wires or plumbing that may be behind it. If you’re unsure about how to handle electrical wiring, it’s best to consult with a professional to avoid safety hazards.
Dispose of the Debris
Once the drywall is removed, carefully break it into manageable pieces for disposal. Use a shop vacuum to clean up dust and debris, and ensure that you dispose of the drywall according to local regulations. Many areas have specific guidelines for drywall disposal, so make sure you follow them.
Inspect the Wall
After the drywall is removed, take a moment to inspect the studs and the rest of the wall. If you plan on reinstalling drywall or making structural changes, now is the time to make any necessary repairs or adjustments.
When to Hire a Professional
While drywall removal is a DIY project that many homeowners can tackle, there are certain situations where it might be best to hire a professional. If you’re dealing with large amounts of drywall, hazardous materials like lead-based paint, or significant structural issues, it’s worth consulting a professional demolition team. Here are a few reasons why:
- Large-Scale Projects: If you’re working on a multi-room renovation or a project that involves removing drywall from multiple walls, a professional can speed up the process and ensure the job is done efficiently.
- Health Risks: If your home was built before the 1970s, it’s possible that the drywall contains asbestos. Professional contractors are trained to identify and safely remove materials that pose a health risk.
- Complex Demolition: If the drywall is part of a more complex demolition, such as removing load-bearing walls or making structural changes, a professional with experience in demolition will ensure the integrity of your home is maintained.
Hiring a professional can save you time, reduce the risk of injury, and ensure that the job is done correctly.
Conclusion
Drywall removal is a necessary step in many home renovations and repairs, but it’s not as simple as just tearing down the walls. To ensure that the job is done safely and efficiently, it’s important to understand the challenges, prepare the necessary tools, and take the proper precautions. Whether you’re removing drywall as part of a larger remodeling project or fixing damage caused by water or pests, following these steps will help you achieve the desired outcome.
If you need assistance with your drywall removal project, don’t hesitate to reach out to Wee Haul Junk. Located in Vienna, we offer expert junk removal services, including drywall removal. Give us a call at 571-489-2961 or email us at info@weehaulnow.com to schedule your service today.